Documentation
Contents
- Introduction
- How it works
- Browser compatibility
- Basic usage with JavaScript
- Unobtrusively with CSS classes
- jQuery
Introduction [top]
Below is a short explanation of how the Pixastic library works and how to use it. There are also pages with details on the individual actions and effects available through Pixastic. These pages also feature small live demos where you can see the library in action.
How it works [top]
Most of the Pixastic actions work by accessing the pixel data of the image and manipulating the image on pixel by pixel basis. This is done via the getImageData() / putImageData() methods available on the HTML5 canvas element. The methods are currently only fully supported by Firefox, Opera and Safari with a recent WebKit nightly build.
The core Pixastic functions take care of creating a canvas element, draws the image on this element and retrieves the image data. This data is then passed on to the relevant action which does “its thing” before returning the data. Finally, the modified data is put back into the canvas and the process is complete. If the original image element has a parent node, Pixastic automatically replaces the original image with the new canvas element. When doing so, the script tries to transfer the element id, CSS styling and other important properties to the new canvas.
Each action may have a number of options that can be used to control various parameters of the effect. See the individual action pages for details. Many effects also support an extra parameter which specifies a rectangular region where you want the effect to be applied.
Browser compatibility [top]
So that explains how things are done when canvas support is available, but since we don’t want to forget Internet Explorer completely, a few of the effects have been simulated using the proprietary IE filters. These include Blur, Desaturate, Lighten, Flip Horizontally and Flip Vertically. These filters are very fast but as you can see, the list is also rather short.
Internet Explorer also does not support the rectangular region option, meaning that you can only apply effects to the entire image. Pixastic will usually convert the image to a canvas element, but this obviously won’t fly on IE so the original img element is always returned in IE.
Since some actions may be supported on one browser and not on others, please refer to the individual action pages for compatibility information. For full compatibility, a browser with canvas (with ImageData) support should be used. Currently that means either Firefox 2+, Opera 9.5+ or Safari with a recent WebKit nightly.
You should also be aware that, due to security restrictions in the canvas element, Pixastic will only work with images that reside on the same host as the page you’re using it on.
At this moment, Pixastic has only been tested extensively on Windows, although I assume Macs to be ok too. There have been reports of trouble with Linux that may have something to do with nVidia drivers.
Basic usage with JavaScript [top]
First include the JavaScript files. You need at least the core module and the specific action files you are going to use. If you’ve downloaded a custom build, you only need to include that one file.
<script type="text/javascript" src="pixastic.core.js"></script>
<script type="text/javascript" src="brightness.js"></script>
When you’ve included the Pixastic .js file(s), a single global object called Pixastic will be available. This object has one interesting method, Pixastic.process, which is used to call all the actions. If everything went right, the new modified element is returned, if something went wrong the function returns false.
The first argument to this function should be a valid image element or a canvas element. The second argument is the name of the action, eg. “blur”, “emboss”, etc.
These first two arguments are (perhaps obviously) required, but the third argument is optional. This is an “options” object that contains any optional parameters for the specific action. The actual parameters naturally vary from action to action and are described on the individual action pages.
Example code:
var img = document.getElement("myImage"); // get the image element
if (img.complete) {	// make sure the image is fully loaded
	var newimg = Pixastic.process(
		img,
		"brightness",	// brightness/contrast adjustment
		{		        // options object
			"brightness" : 60,	// set brightness option value to 60
			"contrast" : 0.5,	// set contrast option value to 0.5,
			"rect" : {		// apply the effect to this region only
				"left" : 100,
				"right" : 100,
				"width" : 200,
				"height" : 150
			}
		}
	)
}
And that’s really all there’s to it!
Note: If you want Pixastic.process to return the new element, you must make sure that the image is completely loaded before sending it to Pixastic, ie. check if the [img].complete property is set to true or, alternatively, call Pixastic.process from the onload event on the image. You can also supply a callback function as the fourth argument to Pixastic.process, this function will then be called (with the resulting element as its first and only argument) when the effect has been applied.
var fnDone = function(newImage) {
	// newImage is the new canvas/image element
}

Pixastic.process(
	img,
	"blur",
	null,
	function() {
	}
);
The last solution is to use the options object. If an options object is passed to Pixastic.process, the resulting canvas can be found in a property called resultCanvas on the options object. Example:
var options = {};
Pixastic.process(image, "action", options);
options.resultCanvas; // <- holds new canvas
Unobtrusively with CSS classes [top]
You can also make Pixastic automatically apply effects to specific images when the page has loaded.
This way, you can use the class attribute on an <img> element to control the effects. Here’s an example:
<img src="/pixastic-docs/sample/Wildebeest.jpg" class="pixastic pixastic-invert"/>

<!-- action options can be specified by adding them in parentheses after the action name. -->
<img src="/pixastic-docs/sample/Wildebeest.jpg" class="pixastic pixastic-blurfast(amount=0.5)"/>

<!-- note the special syntax for the "rect" option -->
<img src="/pixastic-docs/sample/Wildebeest.jpg" class="pixastic pixastic-invert(rect=50,50,150,150)"/>
However, this feature needs to be enabled manually since we don’t want to unnecessarily search the DOM in case you’re only using the JavaScript interface. To enable it you must declare and set the variable pixastic_parseonload = true before loading the Pixastic JavaScript file(s) (or simply add it to the beginning file pixastic.core.js):
<script type="text/javascript">
var pixastic_parseonload = true;
</script>
<script src="pixastic.core.js" type="text/javascript"></script>
<script src="invert.js" type="text/javascript"></script>
Note that this procedure has changed recently with pixastic.core.js version 0.1.3 and any old pages using the previous method involving Pixastic.parseOnLoad must be updated.
Original image:
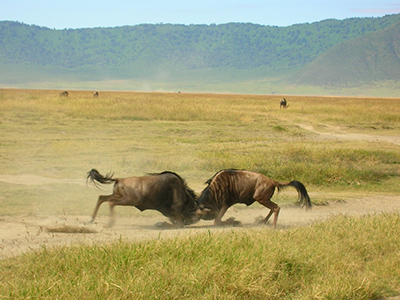
Image with class="pixastic pixastic-invert(rect=50,50,150,150)":
jQuery [top]
Pixastic also has some very simple jQuery functionality. If you choose to include the jQuery part of Pixastic, Pixastic will still work the same as just described, but will also function as a jQuery plugin. This means that you can use jQuery code such as this:
// invert the image with id="prettyface"
$("#prettyface").pixastic("invert");

// convert all images with class="photo" to greyscale
$(".photo").pixastic("desaturate");

// chained blur and a regional emboss, see image further down
$("#myimage")
	.pixastic("blurfast", {amount:0.2})
	.pixastic("emboss", {direction:"topleft", rect:{left:50,top:50,width:150,height:150}});
As you might have guessed, the jQuery plugin is basically a very thin wrapper for the Pixastic.process function. The plugin code checks if jQuery is available before registering itself, so it’s safe to include even if jQuery is not available. When chaining actions, it’s especially important that you ensure that the image is fully loaded before calling the pixastic() method, so it might be wise to put the Pixastic code in an onload event or similar.
Image changed with jQuery: